# Bind-Web
**Repository Path**: tridents_1/Bind-Web
## Basic Information
- **Project Name**: Bind-Web
- **Description**: Bind-DLZ + Flask + Mysql DNS管理平台 https://github.com/1032231418/Bind-Web
- **Primary Language**: Python
- **License**: Not specified
- **Default Branch**: master
- **Homepage**: None
- **GVP Project**: No
## Statistics
- **Stars**: 3
- **Forks**: 1
- **Created**: 2017-10-16
- **Last Updated**: 2023-09-19
## Categories & Tags
**Categories**: Uncategorized
**Tags**: None
## README
Bind-DLZ + Django + Mysql DNS管理平台
系统环境:CentOS 6.5 X64
软件版本:
bind-9.9.5.tar.gz
mysql-5.6.16.tar.gz
Python 2.7.6
Django 1.11.x
描述:
数据库安装就不在絮叨,了解运维的同学都应该知道
一.源码安装配置Bind:
1.源码编译安装
tar -zxvf bind-9.9.5.tar.gz #解压压缩包
cd bind-9.9.5
./configure --prefix=/usr/local/bind/ \
--enable-threads=no \
--enable-newstats \
--with-dlz-mysql \
--disable-openssl-version-check
#官网说明强调编译关闭多线程,即--enable-threads=no
make
make install #源码编译安装完成
2.环境变量配置
cat >> /etc/profile <named.ca
二.配置Bind-Web 管理平台
1.克隆管理平台
(demo) -bash-4.1# git clone https://github.com/1032231418/Bind-Web.git #git 克隆下来
(demo) -bash-4.1# cd Bind-Web
2.安装Django框架
(demo) -bash-4.1# pip instal -r requirement.txt
3.数据库配置:
1.) CREATE DATABASE devops1 CHARACTER SET utf8 COLLATE utf8_general_ci; #创建数据库
2.)配置文件devops/settings 里连接数据库
DATABASES = {
'default': {
'ENGINE': 'django.db.backends.mysql',
'NAME':'devops1',
'USER': 'root',
'PASSWORD': '123456',
'HOST': '127.0.0.1',
'PORT':'3306',
}
}
3.)表结构刷到数据库
python manage.py makemigrations

python manage.py migrate

4.)创建管理用户
(env) [root@pyvm devops]# python manage.py createsuperuser

5.)运行项目
(env) [root@pyvm devops]# python manage.py runserver 0.0.0.0:8001
http://ip/8001 访问WEB 界面 登录账户就是创建的管理用户


三.启动Bind服务并设置开机启动脚本
1.启动 Bind 服务并设置开机启动脚本
(demo) -bash-4.1# /usr/local/bind/sbin/named
2.监控系统日志:
tail -f /var/log/messages
3.如下,说明服务启动正常
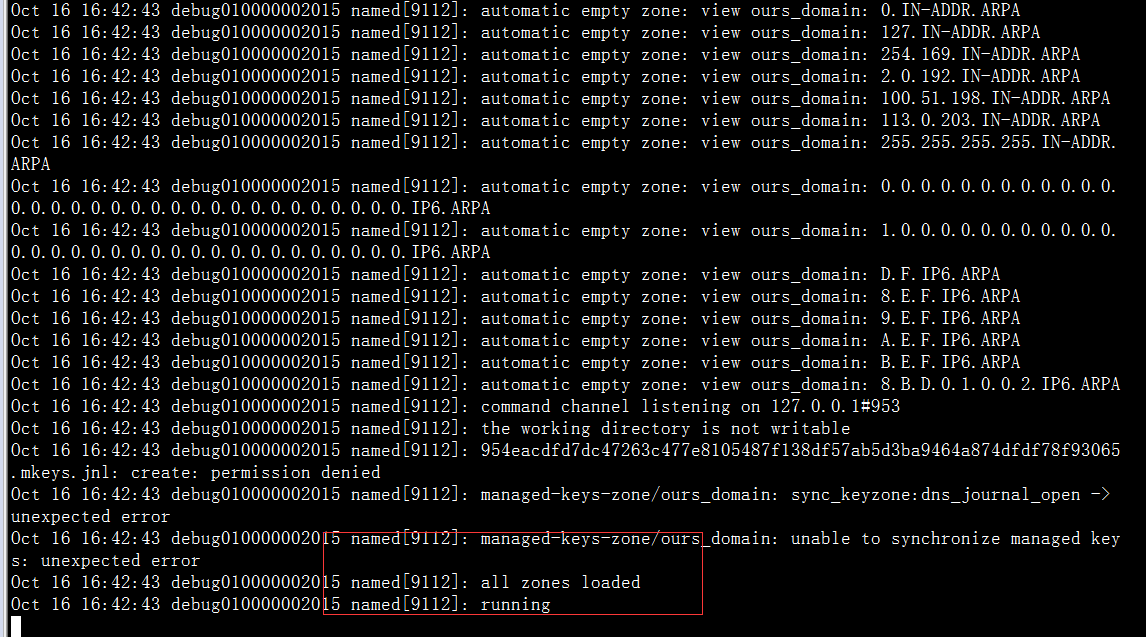
测试bind连接数据库是否正常:

4.设置 Bind 开机启动脚本
bind 本文档会附带,传到服务器 /etc/init.d/ 目录
(demo) -bash-4.1# chmod 755 /etc/init.d/bind
(demo) -bash-4.1# #mkdir /var/run/named/ && chown named:named -R /var/run/named
杀掉 named 服务,改用脚本启动
(demo) -bash-4.1# pkill named
(demo) -bash-4.1# /etc/init.d/bind start #监控日志,查看启动状态
(demo) -bash-4.1# chkconfig --add bind #加入开机启动
tail -f /var/log/messages
