# web-live
**Repository Path**: szxio/web-live
## Basic Information
- **Project Name**: web-live
- **Description**: 使用Node实现一个直播服务,实时直播当前桌面并在线播放
- **Primary Language**: Unknown
- **License**: Not specified
- **Default Branch**: master
- **Homepage**: None
- **GVP Project**: No
## Statistics
- **Stars**: 1
- **Forks**: 0
- **Created**: 2025-07-15
- **Last Updated**: 2025-07-16
## Categories & Tags
**Categories**: Uncategorized
**Tags**: None
## README
## 初始条件
- Node20+

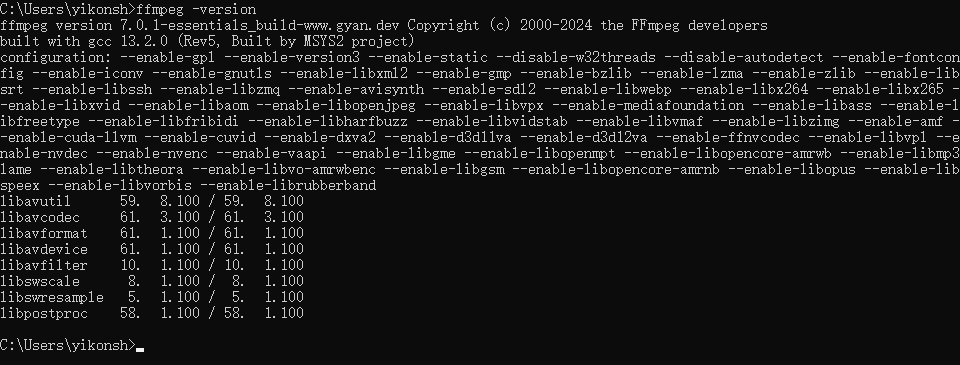
- 需要本机安装好ffmpeg,并且版本7.0+,可以查看我写的[这个文章](https://blog.csdn.net/SongZhengxing_/article/details/139499540)来安装
## 初始化项目
```sh
mkdir node-live
cd node-live
npm init -y
```
## 安装依赖
```sh
npm install node-media-server
```
[Node-Media-Server]( https://github.com/illuspas/Node-Media-Server) 是一款基于 Nodejs 开发的高性能/低延迟/开源直播服务器
## 编写代码
新建 `main.js`
```js
import NodeMediaServer from "node-media-server";
const server = new NodeMediaServer({
bind: "192.168.124.144",
// 推流
rtmp: {
port: 1935,
chunk_size: 60000, //传输大小 60kb
gop_cache: true, //是否缓存
ping: 60, //心跳
ping_timeout: 30, //心跳超时
},
// 拉流
http: {
port: 8000,
allow_origin: '*',
},
})
server.run();
console.log('Server is running on port 8000');
```
启动

## 使用ffmpeg推流
### 推送本地视频文件到 NMS
假设你有一个本地视频文件 test.mp4,可以用如下命令推流:
```sh
ffmpeg -re -i test.mp4 -c copy -f flv rtmp://192.168.124.144:1935/live/stream
```
- -re:以实时速度读取文件(用于模拟直播)
- -i test.mp4:输入文件
- -c copy:音视频流直接拷贝,不重新编码(也可以用 -c:v libx264 -c:a aac 重新编码)
- -f flv:输出格式为 FLV(RTMP 需要)
- rtmp://192.168.124.144/live/stream:推流地址,/live/stream 是自定义的应用名和流名
### 推送摄像头实时画面
假设你用的是 Windows,摄像头设备名一般为 video=Integrated Camera(可用 ffmpeg -list_devices true -f dshow -i dummy 查看设备名):
```sh
ffmpeg -f dshow -i video="Integrated Camera" -vcodec libx264 -preset veryfast -tune zerolatency -f flv rtmp://192.168.124.144:1935/live/stream
```
### 推送桌面画面
```sh
ffmpeg -f gdigrab -i desktop -vcodec libx264 -preset veryfast -tune zerolatency -f flv rtmp://192.168.124.144:1935/live/stream
```
推流成功后的样子
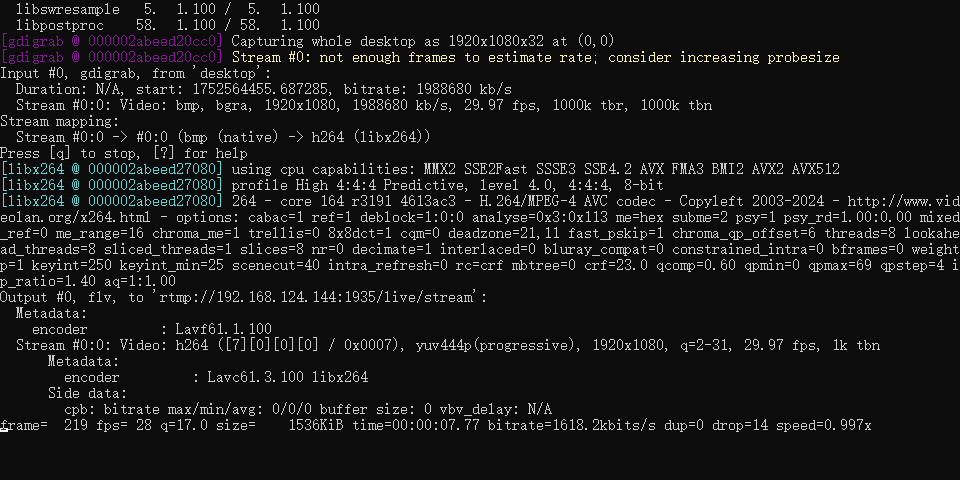
此时控制台输出

## 使用flvjs播放直播视频
安装
```sh
npm install --save mpegts.js
```
[mpegts](https://github.com/xqq/mpegts.js) 是用 TypeScript 和 JavaScript 编写的 HTML5 MPEG2-TS 流播放器。
mpegts.js 针对低延迟实时流播放进行了优化,例如 DVB/ISDB 电视或监控摄像头。
本项目基于[flv.js](https://github.com/bilibili/flv.js)
实现源码
```html
Document
```
## 实现效果

## 案例:实现一个直播当前电脑桌面的功能
### 编写后端代码
安装依赖
```sh
npm install express
```
新建 `server.js`
```js
import express from 'express';
import { spawn } from 'child_process';
import { randomUUID } from 'crypto';
const app = express();
const port = 3100;
const liveAddress = '192.168.124.144'; // 直播服务器的地址,这里就是服务器的ip地址
const livePort = 1935; // 推流端口
const liveFlvPort = 8000; // 拉流端口
// 允许跨域
app.use((req, res, next) => {
res.header('Access-Control-Allow-Origin', '*');
res.header('Access-Control-Allow-Methods', 'GET,POST,PUT,DELETE,OPTIONS');
res.header('Access-Control-Allow-Headers', 'Content-Type,Authorization');
next();
});
app.use(express.static('.'));
// 保存每个直播的 ffmpeg 进程
const liveProcesses = {};
app.get('/start-live', (req, res) => {
const streamKey = randomUUID();
const rtmpUrl = `rtmp://${liveAddress}:${livePort}/live/${streamKey}`;
const flvUrl = `http://${liveAddress}:${liveFlvPort}/live/${streamKey}.flv`;
// 下面的功能是使用ffmpeg采集桌面,并进行推流。可以根据自己的需求修改参数
const ffmpegArgs = [
'-f', 'gdigrab', '-i', 'desktop',
'-f', 'lavfi', '-i', 'anullsrc',
'-vcodec', 'libx264', '-pix_fmt', 'yuv420p',
'-preset', 'veryfast', '-tune', 'zerolatency',
'-acodec', 'aac', '-ar', '44100', '-ac', '2',
'-f', 'flv', rtmpUrl
];
// 用 spawn 启动 ffmpeg
const ffmpegProcess = spawn('ffmpeg', ffmpegArgs, { stdio: 'ignore' });
liveProcesses[streamKey] = ffmpegProcess;
res.json({
streamKey,
rtmpUrl,
flvUrl
});
});
// 关闭直播接口
app.get('/stop-live', (req, res) => {
const { streamKey } = req.query;
const proc = liveProcesses[streamKey];
if (proc) {
proc.kill();
delete liveProcesses[streamKey];
res.json({ success: true, message: '直播已关闭' });
} else {
res.json({ success: false, message: '未找到对应的直播进程' });
}
});
app.listen(port, () => {
console.log(`Live control server running at http://localhost:${port}`);
});
```
> 前提:要先把上面的 main.js 启动起来
启动后端服务
```sh
node server.js
```
### 编写前端页面
```html
一键开播 · Geek Mode
一键开播 · Geek Mode
```
### 效果展示
